You are using an out of date browser. It may not display this or other websites correctly.
You should upgrade or use an alternative browser.
You should upgrade or use an alternative browser.
My Mods: Added Wastemaster Waste Management System
Some readers my know that I've been using a certain brand/style of sewer hose for a number of years now (since 2008 actually). Doug Swarts invented the Wastemaster Waste Management System many years back. Recently, Lippert purchased from Doug, the Wastemaster product and patents and is now having them produced for them. Link to product page.
I had a chance to tour Lippert's enormous After Market Products facility in South Bend recently, where I picked up the current Wastemaster system. I installed it this morning. I've installed these before, so it only took me about 10 minutes.
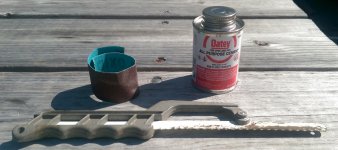
Tools/Supplies I Used
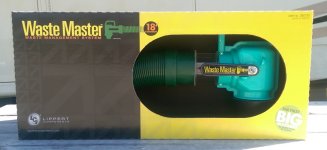
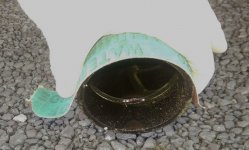
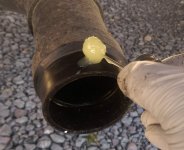
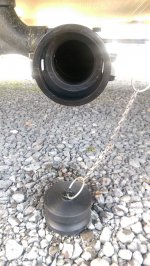
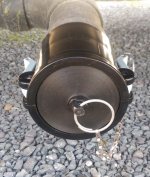
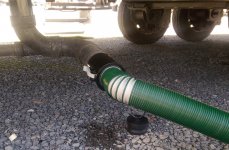
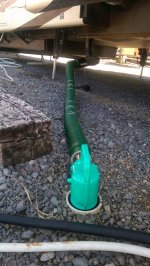
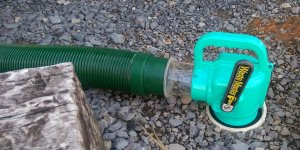
- Wastemaster Waste Management System from Lippert
- Hack Saw
- Emory or Sand Cloth
- ABS or Multi-Purpose Cement
- Remove sewer cap from coach as well as the short rubber tether
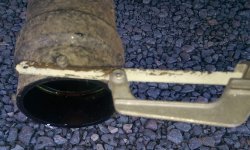
- Using Hack Saw, cut off all 4 barbs for the Bayonet fitting on the sewer outlet
- Using Emory or Sand Cloth, sand down any protrusions where you cut off the barbs, then sand around the entire outside of the sewer outlet (about a 1" wide band from the end). Clean dust off sanded area
- Add cement to the exterior of the last 1" of the sewer outlet. I added cement to the inside of the CamLock adapter too
- Push the CamLock adapter fully onto the sewer outlet in about a 90 degree off position, the carefully twist the adapter into the final position to the Locking Handles are horizontal


Last edited:
Beautiful Jim! Congratulations! Are those a new style aluminum entry steps I see?
Bryce - thanks. Yes, those are the Aluminum Quad Steps from Lippert. I can't say with any certainty when these will be on production units or what a set of them will cost for those who wish to upgrade to them. Time will tell how good they hold up, but after a couple days of using them - I can say "they're really nice". No holes in them either, so puppy dog's nails won't catch in them. Easier to open and close too which is important to Nancy and I'll be a lot of gals.
Just looked these up on Lippert's website. They do look really nice. I may be interested in swapping out when/if these become available to the aftermarket. Here's the link to anyone who is interested. https://lci1.com/alumi-tread
My Mods: Added Coat Hooks, Robe Hooks, Towel Bars etc.
It's hard for an RV manufacturer to know the specific needs for each RVer when it comes to the towel bars, robe hooks, coat hooks, toilet paper holder etc. Then some prefer certain finishes here versus there etc. For us, I know that we want things mounted in places and at heights that work for us.
To my knowledge, the LM 365 product does not current include any of these items. From experience, I know to hit my nearest Lowes (or similar). Hit one last night in Knoxville, TN and spent a couple hours this morning getting it all installed. Below are some pictures.
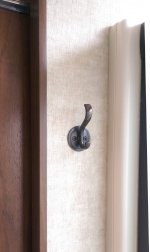
Bath Towel Management - Bars to dry and store current towels and a hook near shower for the in-use towel

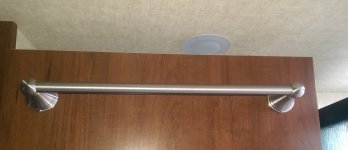
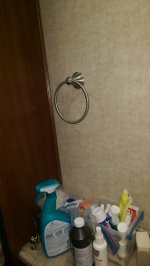
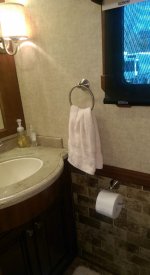
Hand Towel Management and Toilet Paper Holder
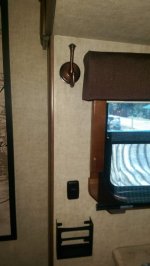
Robe and CPAP Hose Management
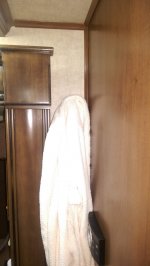
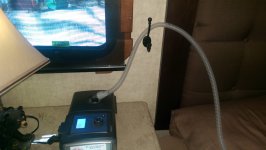
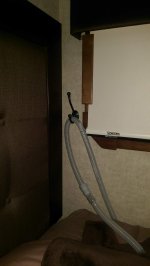
Various Hooks in Various Places for Light Jackets, Dog Leashes, Umbrellas etc.
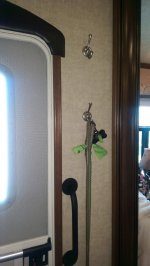
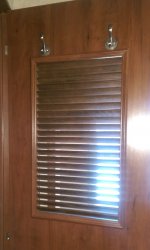
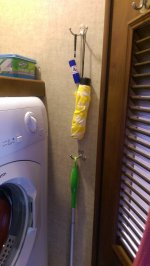
It's hard for an RV manufacturer to know the specific needs for each RVer when it comes to the towel bars, robe hooks, coat hooks, toilet paper holder etc. Then some prefer certain finishes here versus there etc. For us, I know that we want things mounted in places and at heights that work for us.
To my knowledge, the LM 365 product does not current include any of these items. From experience, I know to hit my nearest Lowes (or similar). Hit one last night in Knoxville, TN and spent a couple hours this morning getting it all installed. Below are some pictures.
Bath Towel Management - Bars to dry and store current towels and a hook near shower for the in-use towel


Hand Towel Management and Toilet Paper Holder


Robe and CPAP Hose Management


Various Hooks in Various Places for Light Jackets, Dog Leashes, Umbrellas etc.


My Mods: Added Furniture Glides to Legs of Hi-Lo Desk/Coffee Table
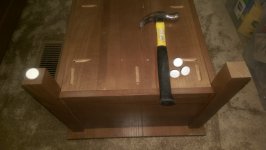
We opted for the Hi-Lo Desk/Coffee Table in our LM 365. This unit is made from solid wood and is heavy, even before adding anything inside of it. When breaking camp, this table must be turned 90 degrees so it's inline with the island - thus allowing the opposing slides to close.
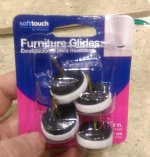
To aid in turning this table, I added those slick, hard plastic furniture mover / floor protector items - one to each leg. I used the type with the nail in it and banged them on with a hammer. I figure I'll have longer term success with these than I would using the ones with an adhesive pad.


My Mods: 3M Command Products
Sounds like a shameless plug, but as many RVers know, the 3M Command products are pretty handy around the RV. Sams and Costco carry larger packs of these are a lower cost per item than smaller stores.
The first item I used was a metal hook. In the kitchen, I hung up the silicone lids Nancy uses when microwaving items that may pop.
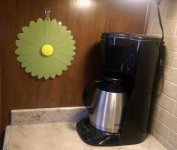

travelin2
Pennsylvania Chapter Leaders-retired
Jim
Looks good and cam locks do provide a secure seal but how do you plan to handle any tank valve leakage? I have a tiny bit and added the additional valve on the outlet so I don't have any surprises when I uncap.
Sent from my iPhone using Tapatalk
Looks good and cam locks do provide a secure seal but how do you plan to handle any tank valve leakage? I have a tiny bit and added the additional valve on the outlet so I don't have any surprises when I uncap.
Sent from my iPhone using Tapatalk
Rcnewell11
Active Member
Congrats jim on new unit .we really love ours .i had a few issues with off door slide and don in service at HL walked me through on the fix .it was slipping gear teeth on tubes for the 3 rd time at hope we have it fixed now.lippert had fix for it on there web site .I added a lot of the same options as u did on towel bars and etc...enjoy
busted2341
Well-known member
Re: My Mods: Added Wastemaster Waste Management System
Hey Jim, Great looking rig. We are even more excited for ours to arrive. Same colors!...All the bars and hooks look good, thanks for the ideas. We have been trying to plan for where we can attach "things". Thanx for all the pics......We can't wait to post some!,,,Frank
Hey Jim, Great looking rig. We are even more excited for ours to arrive. Same colors!...All the bars and hooks look good, thanks for the ideas. We have been trying to plan for where we can attach "things". Thanx for all the pics......We can't wait to post some!,,,Frank
Jim,
Notwithstanding that LCI's link isn't working right now, I've looked at several youtube videos for waste master. The product looks really good. Any chance we can convince LCI to make it available at the Rally?
Ian - yes, they will be selling these at the rally. A couple other products round out their "Sewerage" line, for lack of a better term.
They have a companion piece to the Wastemaster that is a storage compartment. I have one but need find time to install it. I'll document that here when I install it.
Then they have the the Flow-Down product (link) they bought recently. It's a Sewer Hose Support System. I've had one for a year and use it when I'm setup for longer than a few days. Especially when the slope of the land dictates it.
The last item recall in this category is their own version of a waste tank vent cap. It requires very little wind to vent your tank. I have seen the product but don't have any - so no firsthand experience just yet
Re: My Mods: Added Wastemaster Waste Management System
Happy to give you ideas Frank. I'll continue to document and post most of my mods. It's a great way to archive an RV project and an even better way to share it with others who might find it of interest.
Hey Jim, Great looking rig. We are even more excited for ours to arrive. Same colors!...All the bars and hooks look good, thanks for the ideas. We have been trying to plan for where we can attach "things". Thanx for all the pics......We can't wait to post some!,,,Frank
Happy to give you ideas Frank. I'll continue to document and post most of my mods. It's a great way to archive an RV project and an even better way to share it with others who might find it of interest.
Congrats jim on new unit .we really love ours .i had a few issues with off door slide and don in service at HL walked me through on the fix .it was slipping gear teeth on tubes for the 3 rd time at hope we have it fixed now.lippert had fix for it on there web site .I added a lot of the same options as u did on towel bars and etc...enjoy
Ho Rob - sorry to hear you had slide issues. So that I may learn to recognize the signs, how did you know you had an issue? I'm guessing it was louder and maybe jerky?
Jim
Looks good and cam locks do provide a secure seal but how do you plan to handle any tank valve leakage? I have a tiny bit and added the additional valve on the outlet so I don't have any surprises when I uncap.
Sent from my iPhone using Tapatalk
Lyle - I hear you. I've had the CamLock system on 6 coaches now. And there have been times where I've had some "sewer cap surprises". Generally, any liquid I've had behind my cap has been residual that was left in the lines, past the tank gate valves - likely due to insufficient fall on the lines based on install or pitch of my coach.
As a matter or course, I generally have the sewer hose camlock end in my hand while I remove the sewer cap with my other hand. I hold the sewer hose below the sewer output to catch anything present there. Usually very little to none.
This all said, with the coach I just turned in, I was getting some "black tank surprise" a while back. I ended up having the black tank valve replaced. After they removed it, it was obvious there was toilet paper impacted into the blade slot. We changed the valve anyway as I had one with me.
Then more recently, my galley gray tank was not sealing well. I turned the coach in like that and am having the plant replace that valve. But with this valve leak, it was the most problematic for me. We were on the road much of this past January and February and found ourselves in sub-freezing weather many times. On freezing days, I could not leave my sewer hose hooked up as the water from the galley gray would constantly drain as the sink was used. That could have caused a frozen mess. So we had to be careful.
To my knowledge, neither Valterra nor Camco make a plastic 3" external style gate valve with a male to female camlock fitting. I think one could be Frankensteined together with adapters but it would really extend the discharge outlet. Perhaps one day Lippert will make such a valve.
On edit: Let the Frankensteining begin
3" Male Camlock x 3" MPT -> 3" Gate Valve 3" FPT x 3" FPT -> 3" MPT x 3" Female Camlock
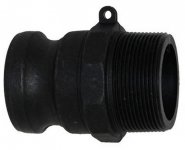
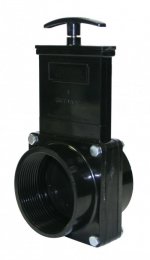
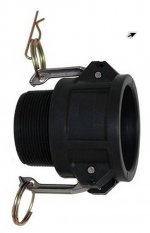
So - there are 3 off-the-shelf parts that could do the task of providing an external gate valve with Camlock fitting on both sides (M to F). It would probably stick out at least 6" more than a bayonet x bayonet valve.. Perhaps the sewer outlet could be cut back a bit to minimize the projection...
Further edit - Frankenstein Light
Perhaps there's a better way. Purchase a Gate Valve 3" Slip x 3" Slip. Hack it into the 3" line that is parallel to the frame before the sewer line makes the 90. Or to make the valve more "replaceable", purchase a Gate Valve 3" FPT x 3" FPT and use 3" MPT adapters. This way, you can spin the valve off (I guess
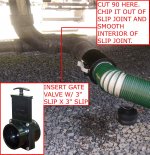
Materials Sources:
3" Camlocks - link
3" Gate Valves w/ Plastic Paddles - Link to Mfr site --- Link to product on Amazon.com
Last edited:
porthole
Retired
Looks to be a good factory option to me - have the flush king installed on the build.
Cutting that pipe flush and trying to get the inner piece out, I just don't think that will work.
But, it looks like you have enough pipe that you could just cut the sweep out and put a new one in with a pair of pipe connectors. That's about what I did on the Cyclone.
Cutting that pipe flush and trying to get the inner piece out, I just don't think that will work.
But, it looks like you have enough pipe that you could just cut the sweep out and put a new one in with a pair of pipe connectors. That's about what I did on the Cyclone.
Further edit - Frankenstein Light
Perhaps there's a better way. Purchase a Gate Valve 3" Slip x 3" Slip. Hack it into the 3" line that is parallel to the frame before the sewer line makes the 90. Or to make the valve more "replaceable", purchase a Gate Valve 3" FPT x 3" FPT and use 3" MPT adapters. This way, you can spin the valve off (I guess)
View attachment 35136
travelin2
Pennsylvania Chapter Leaders-retired
Jim,
If the cam lock fitting is a standard size, these fittings have been used for years and can be easily found at Tractor Supply. Therefore I'd bet the various components could be obtained to adapt your Frankenstein further back under the coach without issue if it became necessary. BTW I'd prefer to have a clear view of the tank contents emptying at the coach end of the hose close to the UDC instead of / in addition to the sewer inlet end 15' away.
Sent from my iPhone using Tapatalk
Similar threads
- Replies
- 1
- Views
- 19K
- Replies
- 0
- Views
- 1K
- Replies
- 232
- Views
- 46K

