My 2013 Landmark Key Largo

brianharrison

Well-known member
Re: Key Largo Modification - Added Gasket to Level Up Control Panel Hatch

It appears Heartland is applying a mar resistant coating on the front lower section of the rig. This should help resist road debris damage.

Is it a mar resistant coating? Or still paint/clearcoat? I cannot discern from the pictures - Jim B, can you elaborate please?
 

jbeletti

Well-known member
Re: Key Largo Modification - Relocation of light switches

Sorry Brian - I'm not sure. Looks like a painted surface that is rough underneath.
 

2psnapod2

Texas-South Chapter Leaders-Retired
It looks like a spray on finish. You can see the same finish on the trim piece and also the Gen door.
 

jbeletti

Well-known member
Key Largo - Bathroom Door Repair

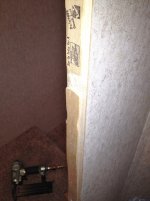
The bathroom door was not staying latched. I felt the gap between the latch side of the door and the molding was a little too wide and the strike plate was slightly low.

I raised the door by removing it from the hinge side molding by removing 2 screws in each of 3 hinges, then raising the door up about 1/8" inch and driving all 6 screws into new locations. Much nicer latching after that.

I removed the latch side molding by first removing the strike plate and screws then by pulling the molding off the door framing. I used a pair of pliers to remove about 10 or so brad nails that were in the door framing. Then I used what I had in the garage to shim the molding out about 3/16". What I used was 4 or 5 thin wooden paint stirring sticks. I shot them onto the door framing with brad nails, reattached the molding and strick plate. Perfect!

Later this week, I'll putty up the brad nail holes.

Jim

bathroom_door_repair.jpg
 

jbeletti

Well-known member
Key Largo Modification - Added buckle Straps over Entertainment Gear

Better living with buckle straps. That's what I always say :)

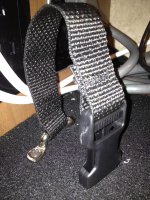
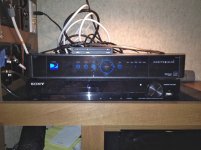
In the last couple of coaches, I've usually added a couple pieces of electronics to the equipment stack. In this coach, I added a Direct TV HD DVR Receiver and a 1x2 HDMI splitter. To keep things in place, I like to add these buckle straps. You can get these at some hardware and big box stores or order them from Heartland.

buckle_strap_1.jpg buckle_strap_2.jpg
 

jbeletti

Well-known member
Key Largo Modification - Added Key Holder

With a couple sets of keys and Nancy's keys vs my keys, seems like a set is always misplaced, because there's no designated place for them.

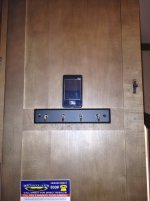
Problem solved! Picked up this little key holder from Lowes today. Added it to the inside of the door to the control panel cabinet.

Also, right above the key holder, I Velcro'd the Lippert Linc Remote Controller. I travel days, I'll keep the controller in the truck. On camping days, I'll probably keep it in this cabinet. When the new truck arrives, I'll add a piece of Velcro somewhere to keep the controller handy and not lost in the cab :)

key_holder_place_for_linc_remote.jpg
 

jbeletti

Well-known member
Key Largo Modification - Added Bath Towel Bar / Hooks / Toilet Paper Holder

The Key Largo has an all in one bathroom. It's functionally laid out but not too terribly big. As such, I came up with my own way of managing towels and toilet paper.

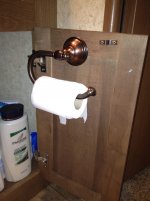
As I did in the Grand Canyon coach, I added a toilet paper holder inside the vanity cabinet, directly in front of the commode. Not much of a stretch at all to reach for a few sheets when needed :)

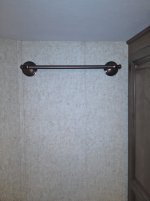
For 1 bath towel, I cut down an 18" towel bar to about 15" and added it above the commode. Been doing that for the past 3 coaches now. The previous 2 had cabinets above the commode, so the bars were mounted to the underside of those cabinets. Not so in the Key Largo. No cabinet above, so the towel bar was mounted to the wall. Careful, there are 3 vent pipes going up that wall :)

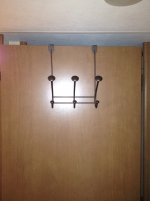
For the other bath towel, we repurposed an over-the-door, coat hanger hook-set on the bathroom door. When I had the door removed for raising it, I added 2 screws in existing holes in the top of the coat hanger hook-set. This keeps it from sliding back and forth on the door and scratching it.

toilet_paper_holder.jpg towel_bar_on_wall.jpg towel_bar_over_door.jpg
 

jbeletti

Well-known member
Key Largo Modification - Insulated water lines and quieted water pump

In my coach, behind the utility wall, there are only 2 pieces of vinyl hose. I believe it comes from the black tank flush connector and up the wall, then back out of a wall and into the underbelly to the jet in the tank.

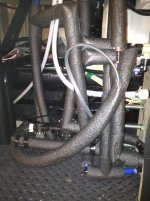
The rest of the lines were all PEX. Even to/from the water pump. There are a few valves and ports in the UDC. So the pipe density on the back side of the UDC is pretty high. And when the pump runs, it's lines chatter with other lines they're touching.

I decided to tackle the pipe chatter when using the water pump, by adding pipe insulation. I figure a little pipe insulation is not a bad thing to have too :)

Did you know this stuff is cheap and real easy to put on? It was actually kind of fun. All I needed was a utility knife, a tape measure and the hands of a child with extra long, slender fingers. But all I had was my fat stubby ones. Oh well.

Did you know they make Ts and Elbows in this stuff too? Talk about easy to work with. Anyway, spent an hour on it, ran out of insulation. Spent $4 at Lowes today for two more 6 foot lengths and viola!

PEX_pipe_insulation.jpg
 

jbeletti

Well-known member
Key Largo Modification - Utility Wall Entry

The utility walls are usually held in place by 3 or 4 white screws in the back left corner of the UDC and 2 or 3 black screws on the left edge of the wall.

Since I've been in and out of my utility area for testing, repairing and modifying, I decided to make it easier to get the wall down.

To the back of the UDC, I added a 32" tall 2x2. I used long deck screws in place of the 3 smaller white screws inside the UDC to hold the 2x2 in place. My wall was sort of tilted too. That is, it rested on the floor okay, but the gap across the top was tapered. I placed a 1x2 on edge behind the utility wall, raised the wall up so it was level across the top and ran some drywall screws into the wall and then into the 1x2. Level wall across the top now :)

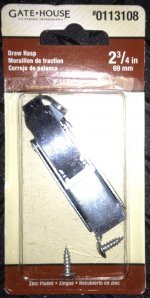
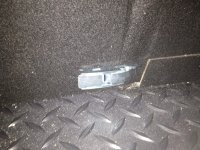
Then, to make the wall screwless to remove and replace, I bought 4 Draw Hasps - two for each side of the wall. So far, I've only installed the 2 for the right side, nearest the UDC. Later, I'll add the other 2 on the left.

utility_wall_1.jpg utility_wall_2.jpg
 

caokgafamily

Well-known member
Re: Key Largo Modification - Utility Wall Entry

Nice work Jim! Is there any big changes on the inside? Did they get the FP centered over the TV? I really like the roof color!

Have fun, Steve
 

porthole

Retired
Re: Key Largo Modification - Added buckle Straps over Entertainment Gear

Better living with buckle straps. That's what I always say :)

In the last couple of coaches, I've usually added a couple pieces of electronics to the equipment stack. In this coach, I added a Direct TV HD DVR Receiver and a 1x2 HDMI splitter. To keep things in place, I like to add these buckle straps. You can get these at some hardware and big box stores or order them from Heartland.

View attachment 18205

I have used Thumb Lock Fasteners many times in the boat for exactly this purpose. I like the cleaner look you get with them.

No pictures but what I have is 4 pieces of AV, Receiver, DVD, VCR and cable box.
The thumb locks have 3M self adhesive strips and 2 mounting holes.
Two thumb locks screwed down on either side, then thumb locks stuck to both sides of each piece of equipment. This keeps everything nice and tight and aligned in a framed opening that does not have a rack.

The Thumb locks originally came out to hold TV's.
http://www.thumblockbyfsi.com/RV.html eBay or Amazon.

The bathroom door was not staying latched. I felt the gap between the latch side of the door and the molding was a little too wide………

I don’t get it – I have seen so many trailers that have that “wide gap” on a rather “private door”. Many different brands

I raised the door by removing it from the hinge side molding by removing 2 screws in each of 3 hinges, then raising the door up about 1/8" inch and driving all 6 screws into new locations.

Just an fyi; depending on the hole size – glue in either toothpicks, small wooden dowels or even a golf tee (sanded) to make “new wood” to re-drill the mounting holes. Especially if the new location is trying to split the previous hole.

With a couple sets of keys and Nancy's keys vs my keys, seems like a set is always misplaced, because there's no designated place for them.

We use a hook right next to the side door, no cabinet near by. And once camping season starts the spare truck key is on that hook. The new truck has the keypad on the door, so camp time usually means the key never comes out of the truck. Don’t want to be stuck xxx miles from home and not have a spare key.
And just to be safe, the spare trailer keys are hanging in the console of the truck.

When the new truck arrives, I'll add a piece of Velcro somewhere to keep the controller handy and not lost in the cab
clip_image002.gif

Sun glass holder in the over head console.

For 1 bath towel, I cut down an 18" towel bar to about 15" and added it above the commode. Been doing that for the past 3 coaches now. The previous 2 had cabinets above the commode, so the bars were mounted to the underside of those cabinets. Not so in the Key Largo. No cabinet above, so the towel bar was mounted to the wall. Careful, there are 3 vent pipes going up that

What do you use for securing to the walls? I have tried several different fasteners, still not completely satisfied with finding something to hold onto the wall material.

For the other bath towel, we repurposed an over-the-door, coat hanger hook-set on the bathroom door.

Use the almost the same thing on the Cyclone. But with layout we have I just have this hanging on the shower enclosure next to the sink. Wet towels go right in the dryer though.

The rest of the lines were all PEX. Even to/from the water pump. There are a few valves and ports in the UDC. So the pipe density on the back side of the UDC is pretty high. And when the pump runs, it's lines chatter with other lines they're touching.
I decided to tackle the pipe chatter when using the water pump, by adding pipe insulation. I figure a little pipe insulation is not a bad thing to have

Behind my UDC I have the same look – PEX and insulation. With all the insulation I have added (same type as yours) I still have some pipe rattle that I can’t get to.

I thought the newer pumps that “ramp up” would minimize that, but what they really do is ramp up the rattle.

I have often considered adding a 110 AC pump. We have one in the boat. Since it is a centrifugal pump is it is very quiet and has no pulsation, just a steady flow of water. Problem with the that style is that you need some way to prime it.
 

porthole

Retired
Re: Key Largo Modification - Utility Wall Entry

The utility walls are usually held in place by 3 or 4 white screws in the back left corner of the UDC and 2 or 3 black screws on the left edge of the wall.

Then, to make the wall screwless to remove and replace, I bought 4 Draw Hasps - two for each side of the wall. So far, I've only installed the 2 for the right side, nearest the UDC. Later, I'll add the other 2 on the left.

View attachment 18213

I'm still removing the screws - don't know how many times I have done that and thought, need to get to HD!
 

jbeletti

Well-known member
Duane,

I used small screws with thread all the way to the head. I didn't pre-drill these and I didn't over-tighten them. Hoping for the best. If it doesn't work out, I'll go with anchors of some sort or I'll span the distance with a piece of finished wood, hitting something solid at the ends, then remount the towel bar to that.

Jim
 

jbeletti

Well-known member
Key Largo Modification - Added Drawer under Computer Pull-out

In the early 2013 Key Largo, to the left of the fireplace is a 2 door cabinet. This cabinet has a single shelf. I need to use this area for office supplies. Tossing it all into a space 22" wide by 20" deep is messy.

Solution? Add a drawer.

Before I left on my current trip, at Lowes, I picked up 4 boards that were 4" x 24" x 1/2" thick, and a set of 20" 3/4 extension side mount drawer slides. From home, I brought some scrap 1/8" paneling, a length of scrap 2"x2" and some basic tools.

At the GA rally, Dick Hill helped me think through this project and he used my small circular saw to cut a dado in the 4 boards, cut them to length, cut the paneling into the drawer bottom and assemble it all into a drawer! We used Gorilla glue at the 4 corners and brad nails.

The next day, Ken AmRhein assisted me in adding the slides and getting the drawer screwed into place in the cabinet.

It's great!

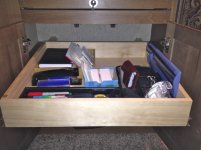
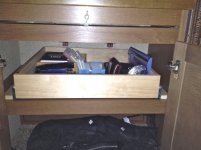
Sorry I didn't take any progress pictures, but here's the finished product:

Drawer - Open.jpg Drawer - Closed.jpg
 

porthole

Retired
Re: Key Largo Modification - Added Drawer under Computer Pull-out

Sure looks good for a campground cabinet maker :)
 

jbeletti

Well-known member
Key Largo Modification - Added Storage Tube for Window Covers

A couple years ago, I had perforated vinyl window screens made for 3 of the windows for my demo coach. This January, I had one of those screens modified by the maker so it would fit the dinette window on my current demo coach. When I turned the last demo coach in, I removed a storage tube I had made fo these window screens.

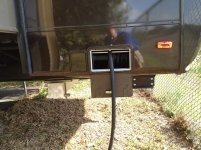
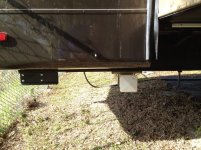
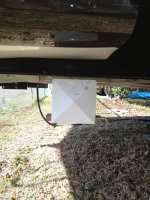
Now with the Key Largo, I needed to remount this storage tube. Due to other items mounted on the "ideal" spot for this large tube, I decided to add it about 3 feet from the back end of the coach. I don't "think" that this far back will be a scrape risk - we'll see.

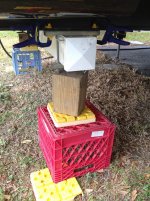
Anyway, I'm at a campground in Florida and made do with what I had to get this remounted. From the pictures, you can see what I used for cribbing to hold the tube in place for the remount. I brought a 14 volt charger for my 18 volt DeWalt drill battery, so drilling 3/8" holes to reuse my old mounting hardware was a no-go.

I checked with my pal Dick Hill. He had a box of 3/4" length Tek screws. 1" would be better, but these will work for now.

Dick came down to my site in a support role :)

The remount turned out fine. Later this week I'll replace the screws with 1" Tek screws and call this one d-o-n-e.

Cribing_Holding_Tube_In_Place.jpg Installed_ODS.jpg Installed_DS.jpg Installed_Closeup_DS.jpg
 

jbeletti

Well-known member
Re: Key Largo Modification - Added Drawer under Computer Pull-out

Sure looks good for a campground cabinet maker :)

The kudos go to Dick Hill. He used my brad nailer to nail a board down to the picnic table seat, then nailed another board on that one to use as a fence/guide to cut the dado in the first board. Repeat and viola - 4 dadoed boards. It was a fun project.

I brought the drawer inside and showed it to Nancy. She said "did you make that?" - in a very surprising tone. I had to fess up.
 

porthole

Retired
Re: Key Largo Modification - Added Drawer under Computer Pull-out

Cric saw, brad nailer - you got me beat - you definitely have more stuff loaded up then I do!
 

jbeletti

Well-known member
Re: Key Largo Baggage Door Strike Plate Adjustment

Duane,

I don't have a lot of tools and none of them are high-end, but I LOVE using a brad nailer. Though Dick never let me use it on the drawer project. But I did get to use it to do the Bathroom Door Fix - so I got my brad nailer fix satisfied :)

I don't usually carry the circular saw, but tossed that small one in the kit just for this project. Just in case I found someone smarter than me to do the project for me :)
 

CliffP

Well-known member
Re: Key Largo Modification - Added Storage Tube for Window Covers

A couple years ago, I had perforated vinyl window screens made for 3 of the windows for my demo coach. This January, I had one of those screens modified by the maker so it would fit the dinette window on my current demo coach. When I turned the last demo coach in, I removed a storage tube I had made fo these window screens.

Jim would you please post some pictures of your window screens?
Thanks for all the great ideas!
Cliff
 
Top