CY 3010 Fresh Water Tank - Some water is inaccessible - Discussion

rtataryn

Active Member
Doug,

So that fitting in fig 271, dropping down through the new cut-out support board - Will it also be dropping down below your bottom fabric cover? In other words, will it and the connecting hose be exposed and visible underneath your carriage? I'm assuming your fabric cover will be attached right up against your new tank support boards.

Rod
 

dougw

Well-known member
I won't really know for sure till after I've re installed all this but based on straight measurements, it would extend below the frame and so it would hit the insulation blanket on the bottom. With that being said the original boards that broke pushed down on the blanket a good 2 in or so and I never noticed. With that being said I'm not expecting any problems with the blanket when I'm done since most of this work is away from the frame rails where the blanket is screwed to.

This is a valid point though that I forgot to take into account. Based on other cutouts around things, I'm thinking that this would be a minor issue to fix if need be.
 

smday

Well-known member
Doug where did you get the fittings from and how did you install them so they didn't leak. We don't have any welders that do that kind of job here in our smaller city. Pictures are great and its to bad Heartland isn't commenting on this and also start fixing other trailers that have this issue. It seems they just want it to disappear.
 

dougw

Well-known member
I took the tanks to "incaplastics.com" that I had posted earlier. The did the welding for me. If it had become any harder for me to find a plastic welder, I would have purchased these fittings and installed them myself.

http://www.usi-rv.com/product.sc?productId=9&categoryId=4

On my last trailer I had a fitting break from age and used a similar product to replace it and it worked well, so that is where I would have gone for a second option to fix this.

I just picked up the 90deg barbed - 1/2" fittings at lowes to screw into the welded fittings, so hopefully I can install them and do a leak check as well tonight. While I had the tanks out last night I did a tank clean with some water and bleach. I put in a few gals of water and a small amount of bleach and "swished" it around, then rinsed a few times. I didn't notice any leaks from around the welded fittings but won't know for sure till it is all back together.

Keep in mind all that I made the decision to do this my self with the expectations that if needed in worse case scenario, that I could just replace the tanks or have new ones build my way. So far so good but after the install and once I see it works will I rest easy<G>.
 

SpaGuru

Member
As a prospective new buyer, and watching this topic closely, I am pleased to see someone attempt to find a working solution to the problem. On the other hand, I am very disappointed in Heartland's responses and solution to this problem and has me giving second thoughts to purchasing their product. As a Pool & Spa business owner here in Nebraska for 25+ years, and a service tech as well, plumbing is a no-brainer for me. The plumbing issues described here in this topic are easily amended in the production stages of the trailer with little or no cost changes. it also seems unbelievable that the tanks would not be initially designed to be completely drained. This should be a mandatory design parameter in the plumbing layout.

The sensor issue could be easily fixed to simply show that when the water level reaches a particular sensor, you are nearly out or need refilling and not 1/3rd full...

Again, being a pool and spa tech here in Nebraska, I have probably forgot more about water freezing and freeze damage than most people will ever know, and I can tell you that 10-15 gallons remaining in the bottom of the tank will freeze but will NOT damage the tank. Water expands when it freezes and if the expansion has no place to go, it will create that space. The tank has an air space above the remaining water and the freezing water will utilize that space when freezing, and not damage the tank. The "suction" port for the pump, on the side of the tank may be damaged from freezing depending on how easily the pump looses prime and how much water drains back down the line into the tank affecting the remaining water level. The drain fitting that was installed in the bottom of the tank by "dougw" is a good idea but if there is any length of plumbing with water in it beyond that fitting, will cause the line to freeze and become damaged. The best thing to do here would be to just put a plug directly in that fitting and manually remove it when the tank needs to be drained. Otherwise the standing water in that line will freeze and damage the plumbing beyond that newly installed fitting in the bottom of the tank.

Personally, I like the idea of a "pick-up" extending into the tank from the side bulkhead fitting, allowing the pump to draw more water from the tank. This eliminates the chance of freezing in the custom bulkhead fitting insstalled by "dougw" and would also allow the pump to remove more water from the bottom of the tank for emptying. A flexible plastic pick-up tube or hose could be used to prevent abrasion to the tank from vibration, and a filter stone or suction grate could be installed on the end to weight the end of the hose to stay at the bottom of the tank.

On sanitization of the remaining water in the tank - if bleach was used to clean/sanitize the remaining water, it is chlorine based and chlorine is affected by sunlight and heat. It will not stay in the water forever and will disipate on it's own over time or be diluted when the tank is refilled. Not something I would worry much about myself.

The fact that there is alot of water not being used and consuming considerable weight and the fact that the tank can not be completely drained are my biggest concerns. Heartland should step up and put a solution to this at the top of the list. Plumbing is not rocket science and a solution could be easily implemented in production and a solution for existing units could also be easily implemented...
 

SmokeyBare

Well-known member
Any one who's used a Chain Saw or a Weed Eater knows that no matter how you hold the machine, it gets runs. Hold it sideways it runs... turn the weed eater upside down and it still runs.

In those fuel tanks they use a flexible hose with a weighted pick-up on the end of that hose. Gravity keeps the hose at the bottom and in the fuel.

Seems the water tanks when filled full... tends to belly down a little. Sort of bulge down. If the pick-up tube was made of some stiff plastic type material, it would move to the lowest location in the tank. Might this could help draw all the water from the lowest part of the tank...

Just a thought that may work... on this ongoing problem.

Marv
 

rtataryn

Active Member
A pick-up would certainly get more water out of the tanks than the current factory set-up, but it does not solve the entire problem. The pick-up will only drain the aft tank that the pump currently draws from. We still have the problem of the forward tank not fully draining into the aft tank.

To solve that we'd have to either add another water pump outlet on the forward tank and then plumb the pump to draw from both tanks, or leave a single pump outlet in the aft tank and create a new water balance connection between the two tanks like dougw has done.

I still think a bottom fitting like dougw made would allow more water to be drained then by a pick-up tube. The tube, even if it can be weighted to the bottom of the tank will begin sucking air once the water level drops below the diameter of the tube. 1/2 inch would be a minimum tube diameter I'd think. That's still quite a bit of water left.
 

lwmcguir

Well-known member
We made an elbow via a bulk head fitting to install on an auxiliary tank that was added on a camper many years ago. The elbow was inserted so the turn of the elbow was about 1/4 inch from the bottom of the water tank. It would allow the pump to draw the water to about that level and worked very good. You could put them on the bottom of the two tanks so the forward tank would drain into the aft tank as well. The tricky part is getting the nut and washer for the bulk head fitting started on the adapters. Works well if you totally pull the tanks, otherwise it is like ice fishing.
 
Last edited:

dougw

Well-known member
So my trailers water tanks are fixed (for now) and all turned out well I think. Here is the link to the last of the pictures. I added the new ones to the old photos.

http://helibuf.com/pictures/water tanks fixed/

The first few from #277 on show the boards installed with the cutouts for the new water lines.

#281 shows the new cross over line from the forward tank zip tied to the existing water pump line heading towards the front of the tank.

#282 shows the rear tank platform. The cutout closest to the camera is the new rear tanks cross over line that connects to the front tank. The farthest tube is the new water pumps line. There is a barb connector at that beam that connects a new piece of water line to the existing line.

The capped off line is going to the old water pump outlet fitting. For now I've capped this until I can come up with a new drain fitting. This will give me 2 fresh water dump lines.

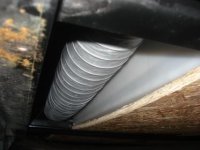
You can also see how the boards fit into the beams and how my doubling boards just protrude a little bit below the beams.

In photo #284 you see a lot of blue marks. The water is at the level that just turns on the 2/3 full light. As you can tell its below 1/2 full. The line that has the "OE' on it is the "old empty" level prior to doing this project. The "NE" is the "new Empty" line. At this level the 1/3 full light will be off, but not by much.

In photos #286 you can see the old water pump fitting. I've rotated it down and added a small segment of water line for a second freshwater drain.

#288 shows the forward tank. You can see the water again at the 2/3's full line. Again the "OE" is the old empty line.

Just for reference in photo #290, this double beam is where I cut the under belly cover. At the end of the project, I've added new self taping screws and large washers that I have screwed into this beam on the left side of the 2 beams. This gave me a solid mount for the under cover and allowed me to tape the rear section to the front section to re insulate.

Photo #292, I had a left over sensor pad from when I installed "rvgauges" panel in my old trailer. This is there "short" version of the sensor. As you can see it is a bit too small for these tanks. If I can figure out how to run any wires needed into the coach from here, my future plans are to use these and install there gauge. I liked having them on my last trailer and having 6% increments in levels. These should work well on these tanks since they are so square. But that will be a future project.

#293, #294 shows the under cover closed up. I used "gorilla" tape from home depot to cover the slit I cut up. While this looks "bumpy" it isn't so bad. The front section was screwed to that cross beam and the back sections then bows as it was prior to this. HL did have other tubes running on the bottom side of some of the cross braces so my boards and hoses really didn't interfere with any thing else there or make the cover do any thing really wierd.

#296 shows the new vent line I addeded (left) and the new freshwater drain (right) protruding through the under cover.

Now for my findings.

To start with I put 10 gals of water into the tanks. I then used the outside showers "cold" only to pump out the water. I was able to get ~6 to 7 gals of water back out of the tanks. At the 10 gal level, the 1/3 light was on. It went off after I had removed ~5 gals of water. So for me when the 1/3 full light goes off, I'm considering the tanks empty. 5 gals's won't go very far.

Then I put in ~35 gals of water. That made the 2/3 full light come on. I then removed ~ 25 gals of water from the outside shower but used both the hot and cold valves this time. I could hear and feel air bubbles purging from the system during draining. At the 25 gals of water removed, the outside shower started getting air bubbles in it to the point I'd consider the tanks empty. After that it would have been possible to get enough water to flush the tolet if needed and wash hands but defently no shower.

So what happened to the other 10 gals of water? I looked at the tanks again and the water level was back down to my new "NE" water line. If there had been an extra 10 gals in the tanks I would expected to see the water level higher then that line. The only thing I can come up with is the 10 gals water filled the water lines as well as the hot water heater. I did originally drain the water from the red and blue lines from the other side of the trailer when I started this.

Then I opened up the freshwater drain line and I was able to get ~3 to 4 gals of water out of it. It was still dripping when I quit but I'm sure there wasn't much more left. I looked at the tanks and really couldn't see much water in the bottom of the tanks. This leads me to believe that with the tanks flater and the lines on the bottom of the tanks I can get pretty much most of the water of of them.

Now a something that really baffled me. At the 2/3 full line, I measured a 1/4" less water in the front tank then I did in the rear tank. I leveled the trailer right on the main from between the 2 tanks and on that cross beam. I also checked level inside the coach and it was defently in the realm of "camping level". When I emptied the tanks, the front tank emptied first, down to the point I couldn't see any water in it and the rear tank still had water in it. I'm not complaining because this is the perfect situation. All the water ends up in the back tank with the water pump fitting in it. This also ment my new cross over tube works as well.

So its not perfect but is better then the way it was when I started. at least now if the 1/3 light goes off it will tell me its time for water. I will still be using a flow meter to add water. For the wife and I we can get by on 30 to 40 gals of water for a 3 day camping trip.

Doug
 

porthole

Retired
Looks like it has worked out well. I doubt I will pull my tanks when I attempt something (in the spring) unless I find a shop that can weld fittings. I may just use the retro fittings I found online (blind bulkhead fitting).

While you were doing this did you notice if there was enough room to raise the tank on the right side to force water towards the new fittings?

It looks like your sewer pipe has the correct slope it needs to drain. On mine the forward tanks discharge elbow is below the level of the center discharge gate, leaving black and gray water in the lines.

Could you take a few pics showing the sewer lines? I brought this up to the reps back in the summer and they were supposed to address it right away on the line, so maybe you got lucky.

FYI, in this picture that silver box has a live 110V AC line capped off in it,It is for the electric air bed option on the bigger trailers.
I tapped into this and added outlets to my couch for lap tops and phones etc.


P1010294.JPG
 

dougw

Well-known member
Both fresh water tanks have vent line fittings on the top side. You might be able to get maybe 1/4" lift on the far side if your lucky. With the boards laying pretty flat and without a lot of bend to them, I'm not all that sure that will be a big issue or not. When it comes time to drain the water for winter, you probably will have just as much luck just driving the right side of the trailer up on a board.

DW
 

rtataryn

Active Member
Doug,

A huge THANK YOU for sharing this !!!!!

This will help me with my project immensely, and hopefully many others.

Rod
 

kbsplus2

Member
a quik ? for everyone. we don't usually use the TH in the winter, but we are doing a trip south and will be staying at an RV park. Like everyone else who experiences winter and now know they have 2" of ice block in their water tanks (except for Doug W)(good job, by the way) I have a problem? I can't use my water tanks until I get far enough south that they thaw or I use the furnace enough to thaw the pump intake on the tank. But then I got to thinking about that big chunk of ice melting and starting to thunk around inside the tank as I'm bouncing down the frost heaves in CO and UT. What to do? I don't want to fill the tanks full and risk having to stop for weather and freeze split the tanks because I can't drain them.... Any thoughts....?
 

caissiel

Senior Member
My 15 year old trailer was the same, the drain was at the same location. We never had problems packing and going south in the early spring. We used water jugs and flush the toilet with them until we hit areas above freezing and filled at FJ.

The older trailer's tank were tall and slim and this area was not so big that it took so much water to fill.
 

k6fn

K6FN
thanks for this great solution... a lot of us seem to be having the same problem with water.. I will be happy to do this fix myself and cure the problem..
thanks again jerry
 

Yianni

Well-known member
Well, in this thread//heartlandowners.org/showthread.php/15430-Fresh-Water-Tank?highlight=water+cyclone Riverman says to call Heartland as they are very willing to help and all the new models coming off line now are totally redesigned. So I read this thread and think Hey, they have a fix and are willing to help us poor guys out that bought a little early. So I call Heartland and am told "Nope, sorry, no fix." So for those of you like me that were hoping for a resolution to this from the manufacturer, looks like we're out of luck.

Sorry, can't get link to work but it's by Riverman and current.
 
Last edited:

Riverman

Well-known member
The factory "fix" for this problem is a redesigned tank. My tanks have a sump on one end with the fitting on the sump. I tested it this weekend and indeed every drop of water was removed from the tanks. I don't imagine they are too interested in supplying new tanks to every previous Cyclone owner, but you could maybe purchase them from the factory & do the switch yourself. The mod Doug posted may be the easier fix??
 

Yianni

Well-known member
The factory "fix" for this problem is a redesigned tank. My tanks have a sump on one end with the fitting on the sump. I tested it this weekend and indeed every drop of water was removed from the tanks. I don't imagine they are too interested in supplying new tanks to every previous Cyclone owner, but you could maybe purchase them from the factory & do the switch yourself. The mod Doug posted may be the easier fix??

The point is I just spent 40 + grand on my 6 month old trailer and I don't want to buy new tanks from the factory. I saw Doug's fix and it looks great but I don't have the time or desire to tear apart my new trailer, let alone trying to find someone who can do plastic welding. This is not something I or all the others should be having to deal with on our own.
I am still generally happy with my trailer but the response I got from customer today was less than impressive. As I said I still like my Heartland but I will not encourage others to buy one as I have in the past.
Here are some pictures of my tanks when fully drained by the valve.
 

Attachments

  • DSC02433 (resized&#41.jpg
    DSC02433 (resized&#41.jpg
    13.8 KB · Views: 69
Last edited:

porthole

Retired
I am taking my 3010 into a licensed HAL repair shop in Fontana, CA this coming Monday to repair the water tank issue, along with some other stuff as well. I'll definitely post back once it's done and with any new info...
Probably won't have the coach back till the end of the month though...

Fixed yet?

The answer I got today from customer service was "Unfortunately, this is the design of the system"
 
Top