Happy to hear Paul and I motivated you to do this simple and effective mod to your Oshkosh.Did my 2018 Oshkosh today. Thanks for the motivation (it was cold outside)
You are using an out of date browser. It may not display this or other websites correctly.
You should upgrade or use an alternative browser.
You should upgrade or use an alternative browser.
jbeletti's 2018 Landmark 365 Newport
- Thread starter jbeletti
- Start date
Thanks Dave. This had been on my list when Paul mentioned to me he wanted to do this. May as well do both coaches when they were nose to tail. Not sure if you saw Paul's thread on placing a local light switch for his Newport clothing closet, but that's a mod on my list too. We did his together and it came out great. That project is way more involved and I need to do it when I have more time. Need to empty out the entire closet, take the rod down, remove the shoe rack etc. But super-worthy of the effort.Nice mod Jim
Bones
Well-known member
Thanks Dave. This had been on my list when Paul mentioned to me he wanted to do this. May as well do both coaches when they were nose to tail. Not sure if you saw Paul's thread on placing a local light switch for his Newport clothing closet, but that's a mod on my list too. We did his together and it came out great. That project is way more involved and I need to do it when I have more time. Need to empty out the entire closet, take the rod down, remove the shoe rack etc. But super-worthy of the effort.
I must have missed Paul's thread. I'll look for it. I have the one mod I want to do to the camper this year but want it to be a bit warmer before I tear the counter-top off.
I must have missed Paul's thread. I'll look for it. I have the one mod I want to do to the camper this year but want it to be a bit warmer before I tear the counter-top off.
Dave - here's a link to Paul's mod thread.
As for your mods, I've seen your home remodeling and when you get going, you jump in with both feet! You'll do great camper mods
Bones
Well-known member
Dave - here's a link to Paul's mod thread.
As for your mods, I've seen your home remodeling and when you get going, you jump in with both feet! You'll do great camper mods
Thanks
Mark-Roberta 051995
Well-known member
New Product Installed: MORryde Step Above entry steps
When my coach was at MORryde getting Kodiak Disc Brakes and Independent Suspension installed (supplied to Heartland by MORryde), they asked if I would be interested in trying their Step Above entry step.
I approved (supplied to Heartland by MORryde) and they installed the latest version with the stairway handle. While we have not traveled with it (except from Elkhart to Goshen), we really like it when setup at the campground. How we like it long-term will be better known later this fall after we take some trips with the new coach and use the steps in rest areas, truck stops and several campgrounds. But so far, we like it a lot!
View attachment 52254
See more images in this gallery.
I am unable to find this particular step. All the ones that I have seen have a twist lock device to keep the steps secure when put away for travel. Yours seems to be just put in place and the 2 plates that are flush on your door sill keep it from moving any further into the coach. I did not see the part number anywhere in the thread. Any help would be appreciated on part # or where I can buy.
Thanks,
Mark
Mark - I'm not sure when one of their staircases comes with that locking handle mechanism. Mine does not need it. I have no part numbers - sorry.
Here's a link to MORryde's site for the steps.
Here's their phone number: (574) 293-1581
Here's an email link to their sales team.
Nabo
Southeast Region Director-Retired
The aftermarket StepAbove steps when first introduced came with the twist-lock handle which is what mine is in that my steps were installed almost 2 years ago. Right now I'm not sure the gravity steps are available as an aftermarket steps because of the threshold trim of the factory installed doors, but I haven't researched this since our installation of our steps. Saw the gravity steps at a local rv show and was impressed.
Mark-Roberta 051995
Well-known member
Mark - I'm not sure when one of their staircases comes with that locking handle mechanism. Mine does not need it. I have no part numbers - sorry.
Here's a link to MORryde's site for the steps.
Here's their phone number: (574) 293-1581
Here's an email link to their sales team.
Jim,
Thanks for the info. - an email was sent so I can learn more
I sent an email to Lippert to ask about this new step because I could not find the one that "goes up with one hand and can stop at 90 degrees and not fall on your head". Their response was that the type that does not fall, is a factory install only because it has a piston to assist it and cannot be easily installed by the do-it-yourselfer. So the aftermarket one is different. I did read that some people have installed the piston one and I think changes may come later.
I hope this was not as bad a read as I see it, but I was in a hurry and not looking at the email I received.
I hope this was not as bad a read as I see it, but I was in a hurry and not looking at the email I received.
Cholo - I'm not familiar with the Lippert step as much as I am with the MORryde. Wondering from your call, if you meant to say you called MORryde, not Lippert?
My step is the Zero-G version with the gas shock to assist with the opening and closing and stays in position when stored. Technically speaking, my steps were installed post-build. Some trimming of the interior wood door trim was required. Unsure what else was done to accommodate it. I didn't do the install myself. I think MORryde did the install when my unit was at their place for the IS and disc brake install.
I'm wondering, due to the slightly more complicated install, if it's really a marketing decision to have the Zero-G steps be OEM only and the Step Above to be an Aftermarket offering.
Cholo - I'm not familiar with the Lippert step as much as I am with the MORryde. Wondering from your call, if you meant to say you called MORryde, not Lippert?
My step is the Zero-G version with the gas shock to assist with the opening and closing and stays in position when stored. Technically speaking, my steps were installed post-build. Some trimming of the interior wood door trim was required. Unsure what else was done to accommodate it. I didn't do the install myself. I think MORryde did the install when my unit was at their place for the IS and disc brake install.
I'm wondering, due to the slightly more complicated install, if it's really a marketing decision to have the Zero-G steps be OEM only and the Step Above to be an Aftermarket offering.
That's exactly what I ment to say. I knew that would happen when I try to respond and don't have all my notes in front of me. Thanks for the clarification.
Mark-Roberta 051995
Well-known member
I went to my local dealership yesterday and all of the Primtime Sanibel 5th wheels have the Moryde zero gravity step above installed. I am very impressed with them and had the wife put them up and down with 1 finger. We are sold. The dealer was going to look at the build sheet for that camper and get a part number for it. They are then going to get pricing and order me one. I did not see any notches in the door jam and found 6 screws holding it firm into the floor. Keep everyone posted
MOD: Open up more space in storage bay
MOD: Open up more space in storage bay.
Time to begin a long thought about mod in the Landmark Newport storage bay to open up more storage space.
GOALS
PROGRESS (reverse chrono)
To Do Work List
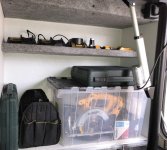
I spent some time yesterday building a shelf and today I installed it
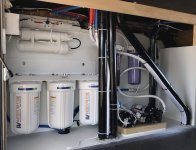
5-May - Completed relocation and testing of complete water plant
This week at the NM Chapter Rally, Kevin W and I completed the relocation of the complete water plant

27-Apr - Header framing, FRP completion, new carpeted wall, other wall covering completion
Today, Greg W and I spent 4 hours today on the following:
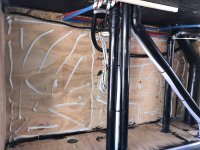
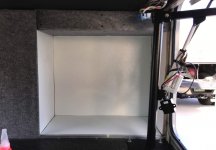
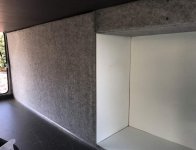
17-Apr - Header framing, joint sealing, large gap sealing, FRP panel cutting and test fitting
Today, Greg W and I spent 2.5 hours today on the following:
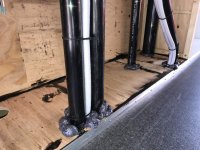
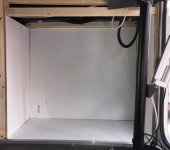
16-Apr - Cubby Built-Out
Today, I spent 3 hours working on the build-out of the new storage cubbies. Today, specifically, the ODS cubby, where my water plant will be relocated to.
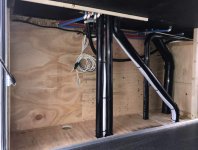
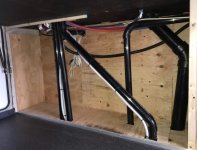
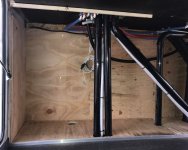
12-Apr - Plumbing Relocation, Cubby Build-Out and Floor Covering
Today, Gregg W and spent about 4 hours working on this mod. We ran out of 2x2s and plywood
Turns out, the 4 white vinyl lines in the chase are for the atmospheric vacuum breakers for the black tank flushers for both of my black tanks. We relocated all 4 in terms of where they came up through the floor of the chase. I will splice them back up later.
Overall Image of Todays Effort
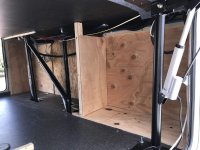
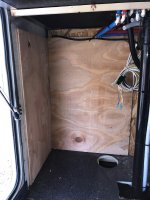
Door Side Cubby
We framed out the door side cubby and lined the 3 walls and floor with 1/2" plywood. Later, we will add FRP to the walls and floor of this cubby. I'll also be adding a removable ceiling for this cubby in case access to the plumbing above it is needed.
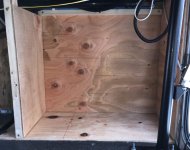
Off Door Side Cubby
We lined out 2 of the 3 walls of the off door side cubby. Later (when restocked), we'll frame this cubby and line the third wall and floor. And even later, we will add FRP to the walls and floor of this cubby as the filtration and RO systems will go here. I'll also be adding a removable ceiling for this cubby in case access to the plumbing above it is needed.
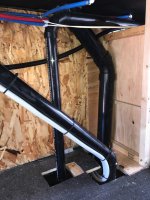
Center Plumbing Chase
So it turns out, by relocating the 4 vinyl lines nearer to the center of this coach width chase, we ended up with about a 3 foot wide plumbing chase in the center of the space. The floor of this chase will be lined with 1/2" plywood and part of the floor will be lined with FRP as the water pumps will be in this space.
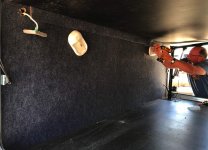
11-Apr - Demo
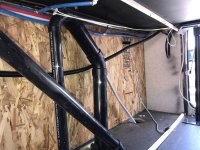
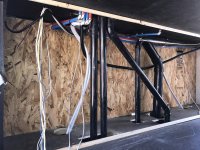
Today, Gregg W and I removed the wall that separates the Newport storage bay from the generator bay. The space between these bays was created by Heartland as a plumbing chase. I believe there is are gray and black tanks, stacked and staggered under the chase and storage bay floor in the drop frame area.
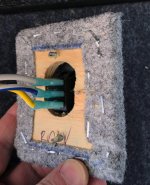
So we removed the storage bay lights, a smoke/co detector (owner installed), the switch for my grill-lift actuator and one of the two switches in a 3-way circuit for the storage bay lights.
Then we removed the long panel. There 2 decent pockets of space that can be trimmed out and used. Tomorrow, we plan to redo the plumbing supply lines to make better use of the space. We'll also cut and install some new wall structure and some plywood sections as a substrate for the storage planned.
MOD: Open up more space in storage bay.
Time to begin a long thought about mod in the Landmark Newport storage bay to open up more storage space.
GOALS
- Open up more storage space
- Trim out two large spaces for
1) Water Plant (filtration, RO and pumps) (FRP laminatted to plywood?)
2) Possible pellet smoker supplies storage (carpeted shelving?)
PROGRESS (reverse chrono)
To Do Work List
- Reconnect and relocate grill lift switch
- Remount AC splice box in overhead wiring chase
- Create panel to mount above AC splice box into as fixed cover at end of wiring chase
- Create ceiling panel to cover remaining overhead wiring chase
- Paint black and add Velcro pieces to header over water plant cubby
- Add handles to carpeted panel that covers water plant cubby
- Cut in passive vent in carpeted panel that covers water plant cubby (for added heat from storage bay)
- Add AC receptacle in DS cubby (for tool battery chargers)
- Install 2 ea previously removed pancake lights to ceiling above water plant, then wire to UDC light, light switch (so water plant lights come on when UDC light is turned on - for added heat)
- Wire up relocated 3-way bay light switch on UDC wall
- Install 5 LED light fixtures in various locations of storage bay and utility area, wire all together and to 3-way light switch circuit in bay
- Seal hole in water plant cubby floor where plumbing lines penetrate it
- Add a floor drain to water plant cubby
- Rework pressure gauges in UDC (reduce to only 1 and remount it to not expose any line in UDC)
- Mount water leak sensor and display, then write and test alerts in home automation system
- Add additional WH Bypass valve (3-way) to UDC to use as RO Brine director (tank vs ground)
- Rework tracks and carpeted panel for storage bay walls on utility side
- Rework various electrical wiring on upper deck of storage bay to make storage of totes etc. easier and safer
- Install DC power receptacle in storage bay utility wall near Cheap Heat disconnect and controller (to be used for powering in-bay AC/DC refer/freezer as needed)
- Insulate (blue XPS) vertical gap between upper and lower decks in utility area
- Seal holes and voids in underbelly and frame to better contain underbelly heat and for added protection from rodent entry
- Other stuff I'm not thinking about
I spent some time yesterday building a shelf and today I installed it
- Built and carpeted shelf
- Added Dewalt battery chargers and power strip to shelf (screwed all of them down)
- Installed shelf in door side cubby

5-May - Completed relocation and testing of complete water plant
This week at the NM Chapter Rally, Kevin W and I completed the relocation of the complete water plant
- Caulked corners/seams of FRP in water plant cubby (ODS)
- Caulked corners/seams of FRP in storage cubby (DS)
- Ran wiring for a DC power receptacle from DC fuse panel in coach to storage bay utility wall near Cheap Heat disconnect and controller (to be used for powering in-bay AC/DC refer/freezer as needed)
- Relocated (to UDC wall) previously removed ODS 3-way bay light switch
- Installed AC recept in ODS cubby for RO Boost Pump PSU
- Installed wall switch in coach at control panel to switch AC power on/off to above AC recept
- Installed tiny blue LED in coach at control panel (indicates status of power to above AC recept - i.e. making RO water)
- Ran 4 ea 1/2" PEX lines, 2 ea 1/2" poly lines, water pump power line and heat tape from behind UDC to water plant cubby
- Insulated above 6 lines with pipe insulation wrap
- Replaced 2 ea 75 GPD RO membranes with 2 ea 150 GPD membranes and 75 GPD flow restrictor with 150 GPD flow restrictor
- Installed jumbo cartridges in 3 ea jumbo filter housings (5 mic sediment, carbon and ceramic)
- Mounted above RO membrane / housings and filter set on back wall of water plant cubby
- Plumbed and mounted RO membrane bypass kit (for cleaning RO membranes with unrestricted high-flow water)
- Mounted RO boost pump and demand pump on wood base with foam padding on bottom, then mounted to floor of water plant cubby
- Installed pH neutralizing media into single 10" housing and mounted to back wall of water plant cubby
- Installed carbon (polishing) filter media into single 10" housing and mounted to back wall of water plant cubby
- Mounted pressure vessel (accumulator tank) to back wall of water plant cubby
- Plumbed all of the above items, then pressure tested and resolved 2 leaks
- Completed FRP installation on all cubby walls and floor


27-Apr - Header framing, FRP completion, new carpeted wall, other wall covering completion
Today, Greg W and I spent 4 hours today on the following:
- Replumbed 4 vinyl lines for atmospheric vacuum breakers (used straight splices vs elbows)
- Completed FRP installation on all cubby walls and floor
- Completed some interior framing of ODS cubby
- Installed header across top of ODS cubby
- Cut plywood for ODS cubby wall, carpeted it and installed it
- Installed aluminum track, horizontally on back DS cubby wall with track opening facing outward
- Cut plywood for ODS cubby ceiling, carpeted it and installed it (into track above)
- Cut plywood for ODS cubby header, carpeted it and installed it


17-Apr - Header framing, joint sealing, large gap sealing, FRP panel cutting and test fitting
Today, Greg W and I spent 2.5 hours today on the following:
- Used black expanding foam and sealed larger gaps ABS pipes went through 1/2" plywood we added
- Used Dicor self-leveling sealant to fill some rather large knot hole depressions in floor plywood
- Used black silicone rubber caulking to seal vertical and horizontal joints in 1/2" plywood
- Did a small amount of header framing for the DS cubby
- Cut back and side wall panels of FRP and test fit them in the DS cubby


16-Apr - Cubby Built-Out
Today, I spent 3 hours working on the build-out of the new storage cubbies. Today, specifically, the ODS cubby, where my water plant will be relocated to.
- I finished lining the back wall and entire floor with 1/2" plywood.
- I also cut and installed aluminum track on the floor where the carpeted walls will set/pocket into.


12-Apr - Plumbing Relocation, Cubby Build-Out and Floor Covering
Today, Gregg W and spent about 4 hours working on this mod. We ran out of 2x2s and plywood
Turns out, the 4 white vinyl lines in the chase are for the atmospheric vacuum breakers for the black tank flushers for both of my black tanks. We relocated all 4 in terms of where they came up through the floor of the chase. I will splice them back up later.
Overall Image of Todays Effort

Door Side Cubby
We framed out the door side cubby and lined the 3 walls and floor with 1/2" plywood. Later, we will add FRP to the walls and floor of this cubby. I'll also be adding a removable ceiling for this cubby in case access to the plumbing above it is needed.

Off Door Side Cubby
We lined out 2 of the 3 walls of the off door side cubby. Later (when restocked), we'll frame this cubby and line the third wall and floor. And even later, we will add FRP to the walls and floor of this cubby as the filtration and RO systems will go here. I'll also be adding a removable ceiling for this cubby in case access to the plumbing above it is needed.

Center Plumbing Chase
So it turns out, by relocating the 4 vinyl lines nearer to the center of this coach width chase, we ended up with about a 3 foot wide plumbing chase in the center of the space. The floor of this chase will be lined with 1/2" plywood and part of the floor will be lined with FRP as the water pumps will be in this space.

11-Apr - Demo
Today, Gregg W and I removed the wall that separates the Newport storage bay from the generator bay. The space between these bays was created by Heartland as a plumbing chase. I believe there is are gray and black tanks, stacked and staggered under the chase and storage bay floor in the drop frame area.
So we removed the storage bay lights, a smoke/co detector (owner installed), the switch for my grill-lift actuator and one of the two switches in a 3-way circuit for the storage bay lights.
Then we removed the long panel. There 2 decent pockets of space that can be trimmed out and used. Tomorrow, we plan to redo the plumbing supply lines to make better use of the space. We'll also cut and install some new wall structure and some plywood sections as a substrate for the storage planned.


Last edited:
Quite the void and is just screaming for a cubby or two.
Surprised also with how much empty space you have behind the other wall I saw when you were doing the cheap heat or other projects in there.
Agreed. Lots of opportunity to open up space on the Newport. And I fill it all
Jesstruckn/Jesstalkn
Well-known member
Sounds like fun to me !! Lots of space in to be had. Will you grill lift stay in the same place ?
Looking forward to seeing the finished product.
Sent from my SM-N950U using Tapatalk
Looking forward to seeing the finished product.
Sent from my SM-N950U using Tapatalk
Sounds like fun to me !! Lots of space in to be had. Will you grill lift stay in the same place ?
Looking forward to seeing the finished product.
Hi Jerrod - yes, lots of space, though I wish it was reversed side-for-side as I can use more space in the ODS - but oh well
The Grill Lift will stay. You and I thought and engineered the lift and it's placement well.
Similar threads
- Replies
- 168
- Views
- 42K
- Replies
- 4
- Views
- 2K
- Replies
- 4
- Views
- 12K
- Locked
- Poll
- Replies
- 1K
- Views
- 152K
