jbeletti's 2019 Ford F150 Platinum

jbeletti

Well-known member
f150.jpg

I figured since this truck is on order, it's time to start an official thread for it.

As many already know or have read elsewhere on the forum, we've sold our 2017 F450 as we're downsizing our RV.

In its place, we've ordered a 2019 F150 SuperCrew Cab Short Bed (5.5') 4X4 Platinum.

Below, I'll try to maintain an index of orders and mods.


My 2019 Ford F150 Platinum Article Index


DESCRIPTIONLINK
Truck Order / Window Sticker (when available)Link
Classy Chassis Upfit OrderLink
Rear Bumper DC Power Connector for RV Charging and Vehicle Jumping​
Link
Furrion Vision S 7" Monitor (for RV cameras)Link
TST TPMS and Color Screen
Spray-in Bed Liner
AirLift Ride Control System - 59570
Air Lift WirelessOne EZ Air Compressor and Control System - 25980EZ
Bed mounted Anderson Power Pole Double-Outlet for lower current items (portable refer etc.)
 
Last edited:

jbeletti

Well-known member
Truck Order / Window Sticker (when available)

See the attached (PDF) Build & Price document from the Ford website with the exact configuration ordered.

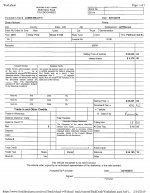
Here's an image (redacted) of the Buyer's Order
2019 Ford F-150 Platinum - Buyers Order. - for HOF.jpg
(click above image for larger view)

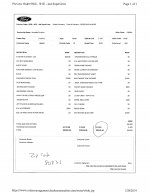
Here's an image of the Ford Order System order preview
Ford Order System - Order Preview.jpg
(click above image for larger view)
 

Attachments

  • 2019 Ford F-150 - Build & Price.pdf
    1.1 MB · Views: 27

jbeletti

Well-known member
Classy Chassis Upfit Order

My dealer, Jeff Barnes of Brondes Ford in Cleveland, OH will deliver the truck to Classy Chassis in Valparaiso, IN.

Classy Chassis will install a few things for me.

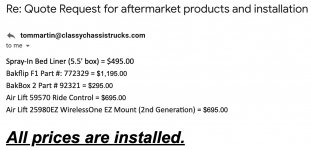
Here's an image of my quote:

Classy Chassis Quote.jpg
(click above image for larger view)
 

jbeletti

Well-known member
Rear Bumper DC Power Connector for RV Charging and Vehicle Jumping

So the items listed below should enable me to place a high-current connector under the rear bumper to the passenger-side. With the switch below, I should be able to turn the power feed off to the lead from underhood to the bumper and do this from inside the cab.

I plan to make or buy jumper cables and use welding cable terminated with Anderson SB175 connectors with handles.

I also plan to cut the alligator-style clamps off my Viair 400 RV compressor hack on an Anderson SB175 connector with a handle. I'll also add
an Anderson SB175 connector to a set of larger alligator clamps. I fact, I may even share these clamps between the compressor and the jumper cables - as may be needed (albeit rarely).


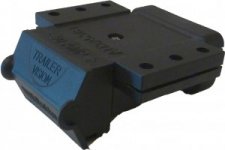
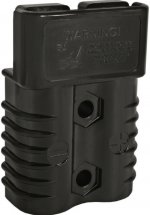
Trailer Vision Bumper Housing for Anderson SB175 Power Pole Connector - One of these will be mounted below the rear bumper and one will be mounted on the A-frame of the travel trailer. I purchased 2 of these from Couple Mate Trailer Parts - link. I paid $50.45 - delivered from Australia.

Trailer Vision SB175 Outdoor Housing.jpg
(click above image for larger view)


Anderson Power Pole SB175 Connector - This will be slipped inside the above Trailer Vision housing on the truck and RV
Anderson Power Pole Connector - SB175 - Black.jpg
(click above image for larger view)


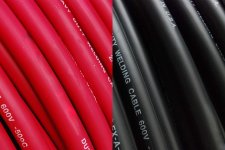
TEMCo WC0053-50' (25' Blk, 25' Red) 1/0 Gauge AWG Welding Lead - To be run from truck battery to above SB175 on rear bumper
TEMCo WC0053 1:0 Welding Cable.jpg
(click above image for larger view)


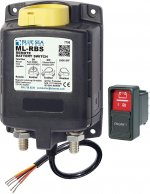
Blue Sea Systems 7700 ML-Series Remote Battery Switch with Manual Control (12v DC) - To be installed underhood between Fuse and leads going to rear bumper (thanks Duane)
Blue Sea Systems 7700 ML-Series Remote Battery Switch with Manual Control (12v DC).jpg
(click above image for larger view)


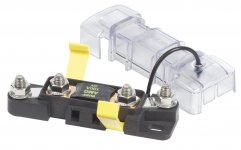
Blue Seas Systems Mega AMG Fuse Block - 7721 - To be installed underhood between Battery and Battery Switch
Blue Seas Systems Mega AMG Fuse Block - 7721.jpg
(click above image for larger view)


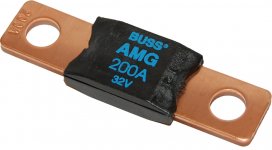
Blue Sea Systems Mega AMG 200 Amp Fuse - 5105 - To be installed inside Fuse Block above
Blue Sea Systems Mega AMG 200 Amp Fuse - 5105.jpg
(click above image for larger view)


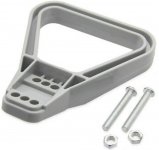
Anderson SB175 SB Series Connector Handle Kit- I'll use this on the jumper that will connect to RV to the truck.
Anderson SB175 SB Series Connector Handle Kit.jpg
(click above image for larger view)
 
Last edited:

TahoeCamper

Founding Nevada-North Chapter Leader-Retired
Jerrod, you and Jim are going to be VERY busy :confused:. ​Nancy, Rhonda and Zoey will have lots of time to go shopping.
 

jbeletti

Well-known member
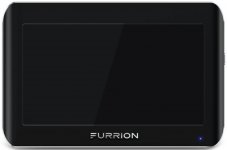
Furrion Vision S 7" Monitor (for RV cameras)

I have 3 Furrion cameras that I'll be installing on the RV. I'll use the Vision S 7" monitor in the cab of the truck to monitor the cameras. The 5" and 7" Vision S cameras are both 4-camera capable touchscreens.

Anyway, I'll need to determine how I want to power the monitor and mount it. It came with a windshield suction cup mount. It also came with a table bracket and my plan is to move the monitor to the RV once we're setup.

Furrion Vision S - 7%22 Touchscreen.jpg
(click above image for larger view)
 

jbeletti

Well-known member
Jerrod, you and Jim are going to be VERY busy :confused:. ​Nancy, Rhonda and Zoey will have lots of time to go shopping.

Good one George!

In 2017, I was in Elkhart for 2 weeks before relocating to Goshen. This year, I'm only in a week early. So I'm not sure how much I can get done and still keep laser-focused on rally planning and execution. We shall see :)
 

TahoeCamper

Founding Nevada-North Chapter Leader-Retired
Jim, As always, whether you have 2-weeks or just one week, you and your team will host a MAGNIFICENT national rally . One of these days Laura and I will be able to attend.

Jerrod, I wish I could help you, maybe uncork a bottle early each morning
:p
George
 

jbeletti

Well-known member
Jim, As always, whether you have 2-weeks or just one week, you and your team will host a MAGNIFICENT national rally . One of these days Laura and I will be able to attend.

Jerrod, I wish I could help you, maybe uncork a bottle early each morning
:p
George

George - thank you for the kind words. Between Julie and I, I'll guess we spend a couple thousand hours working on the planning. Then us and the team with the execution. It's a lot of effort but it's all made worth it in the end with a LOT of happy campers.

Maybe 2021 George!
 

jbeletti

Well-known member
I have manual and hydraulic crimpers :D ...........

Thanks - I'll probably buy a set of hydraulic crimpers with a number of dies to do as large as 2/0. Trouble finding one where the dies as actual AWG size. The more affordable ones are metric sizes. In chatting with Michael Kidd, a few times, he has to use a bit smaller die to crimps some lugs as the next one up was too big. I don't want to spend more that maybe $50-$60 on a set.

I have the TRIcrimp crimping tool for 15, 30 and 45 amp Anderson power pole contacts. I guess now I need one that will do the contacts in various wire sizes for the SB175. Ouch - this one is really $$.
 

porthole

Retired
Thanks - I'll probably buy a set of hydraulic crimpers with a number of dies to do as large as 2/0. Trouble finding one where the dies as actual AWG size. The more affordable ones are metric sizes. In chatting with Michael Kidd, a few times, he has to use a bit smaller die to crimps some lugs as the next one up was too big. I don't want to spend more that maybe $50-$60 on a set.

I have the TRIcrimp crimping tool for 15, 30 and 45 amp Anderson power pole contacts. I guess now I need one that will do the contacts in various wire sizes for the SB175. Ouch - this one is really $$.

The first crimper you listed is only good up to 10AWG

This is one of the crimpers I have. Works OK. As MK said - numbers are off. I also found that I would have to use 1 or 2 sizes under depending on the project.

https://www.amazon.com/gp/product/B00ZA2P3XM/ref=oh_aui_search_asin_title?ie=UTF8&psc=1

Here is a chart for the typical metric imported tool.

Short chart:
16.00mm2 (6AWG)
25.00mm2 (4AWG)
35.00mm2 (2AWG)
50.00mm2 (1AWG)
70.00mm2 (2/OD)
95.00mm2 (3/OD)
120.00mm2 (4/OD)
150.00mm2 (250MCM)
185.00mm2 (300MCM)
240.00mm2 (450MCM)
300.00mm2 (550MCM)


Some other goodies for you.

Crimper for MC4 connectors

https://www.amazon.com/gp/product/B071RGBY19/ref=oh_aui_search_asin_title?ie=UTF8&psc=1

MC4 connectors (I have a bunch of extras of these)

https://www.amazon.com/gp/product/B00KNXPIUG/ref=oh_aui_search_asin_title?ie=UTF8&psc=1

Crimps I got to try out on heavier wire. Mainly for the 4 and 10AWB cables I am using for solar. These slide on over the loose strands then you insert the into the lug. The lug screw does the crimping. Keeps the strands from blowing out and not getting full contact.

https://www.amazon.com/gp/product/B015K437CI/ref=oh_aui_search_asin_title?ie=UTF8&psc=1
 

jbeletti

Well-known member
Good info Duane - thanks.

Question, in your experience, is the crimp made by the hydraulic crimper you listed (the yellow one) on say, battery type lugs, the same type crimp needed for large AWG (say 2 to 2/0) APP contacts used in the SB175 housing?

To the best I can tell, both are hexagonal crimp types. If this is true, then I'm thinking the smaller tri crimper will work fine for my smaller APPs and get the big yellow crimper for all my battery lug needs and call it done with those two crimper.
 

porthole

Retired
Good info Duane - thanks.

Question, in your experience, is the crimp made by the hydraulic crimper you listed (the yellow one) on say, battery type lugs, the same type crimp needed for large AWG (say 2 to 2/0) APP contacts used in the SB175 housing?

To the best I can tell, both are hexagonal crimp types. If this is true, then I'm thinking the smaller tri crimper will work fine for my smaller APPs and get the big yellow crimper for all my battery lug needs and call it done with those two crimper.

I have used this hydraulic (and a manual crimper as well) on everything from 8 awg to 4/0.

Note on the hydraulic hex. I have found with this tool that the lug tends to have a flash on the sides where the two dies meet, very thin like you find on injection molded plastic.
I either grind it off or flip the lug 90 degrees and re-crimp. And I almost always use adhesive lined shrink tubing so you don't see it anyway.

I've seen the same results on others locally that have a similar low cost hydraulic crimper. When I worked at CAT we did not have that problem, but that was a $3000 tool.
 

jbeletti

Well-known member
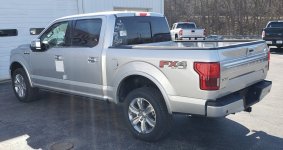
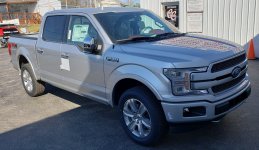
Look what just got unloaded at Classy Chassis in Valparaiso, Indiana...

The new mini-beast has arrived. I won't actually go get it for 30 to 60 days.

20190319_100917_resized.jpg 20190319_102510_resized.jpg 20190319_102601_resized.jpg
 

jbeletti

Well-known member
That FX4 decal has got to go. Tom's team will remove that like they did on my 450.

Looks like we need some window tint too.
 

Sniper

Well-known member
That FX4 decal has got to go. Tom's team will remove that like they did on my 450.

Looks like we need some window tint too.
Agreed! I wish I knew of a competent company or individual close by to remove that same decal on ours too. It really takes away from the look of the truck in my opinion. Your new truck is looking good tho.

Safe travels. :)
 
Top