jbeletti's 2015 Landmark 365 Ashland

jbeletti

Well-known member
My Mods: Added Shelf in Washer/Dryer Closet

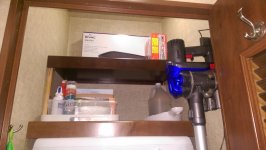
In the LM 365 Ashland washer/dryer closet, there is a fixed shelf above the dryer. This shelf not only serves the purpose of storage but also helps "pin in" the washer/dryer.

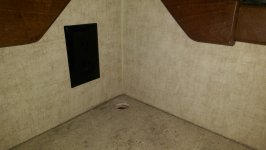
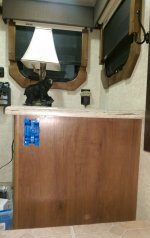
Above this shelf is a whole lot of vertical space. In this mod, I added a half-depth shelf, 12-1/2" above the existing shelf. That height allows me to get a tall bottle of white vinegar on the shelf below it.

And because the added shelf is half-depth, it allows me to get items in through the closet door and up onto the shelf.

I used a cripple on the left side for support as there was nothing solid in that interior side wall where I needed to fasten the shelf.
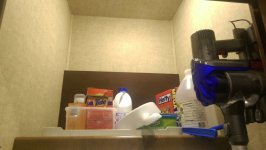
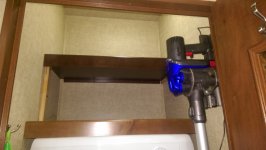
W-D Closet - Before.jpg W-D Closet - After.jpg W-D Closet - After - Loaded.jpg
 

porthole

Retired
Re: My Mods: Experimental use of Refer Latch

drilling holes in the refer door to install this. So for this experiment, I'm using 3M trim tape.

If the "knob" part is flat enough on the back, after 24-48 hours of the 3m tape, I don't think you'll have to worry about screws.
 

fredwrichardson

Past New Mexico Chapter Leader
Re: My Mods: Experimental use of Refer Latch

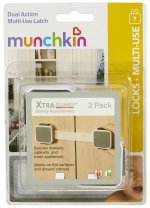
This mod is an experiment. I'm not yet fully-committed to drilling holes in the refer door to install this. So for this experiment, I'm using 3M trim tape. I think I'll try this out on our trip to Goshen and use the velcro strap loosely as a backup. I may slip a strip of paper between the door case and door gasket on both the freezer and refrigerator sections to determine if the doors came open at all during travel.

Note that this latch is used on some residential refers by some RV OEMs. I personally saw it in use in a Lifestyle RV (Calvin and Judy H's new coach).

I welcome any feedback.

View attachment 36401 View attachment 36403 View attachment 36405 View attachment 36406 View attachment 36407 View attachment 36408 View attachment 36409

Jim,

Where did you get the latch and does it have a model number? Also I would worry about screws into the door. Being metal to metal a good epoxy would hold it very well.
 

jbeletti

Well-known member
My Repairs: Fixed Pantry Roll-out Drawer Stack

We have two pantrys in the Ashland. Both have upper and lower sections. Like all LM 365 floor plans, the lower sections have cabinet doors that open up to reveal roll-out drawers (thank you Tom M!). We love drawers and and roll-outs in cabinetry below counter level :)

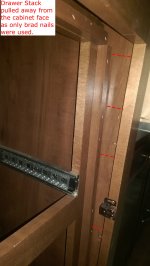
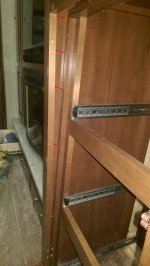
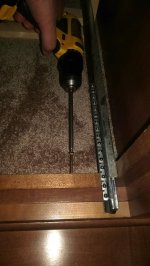
Anyway, recently, I noticed the roll-out drawer stack for the pantry between the entertainment center and kitchen was loose in some way. Upon further inspection, I found that the framework the roll-out drawer slides are mounted to had pulled loose from the cabinet face frame.

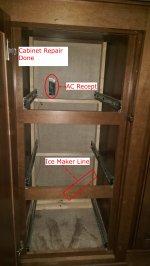
Kevin Wolbeck and I removed the 3 roll-out drawers and examined the framework. The framework is screwed to the slide floor at the back - so that's good. We found that Heartland fastened the front of the framework with brad nails to the inside face frame of the cabinet. The weight of our stuff in the drawers caused the framework to pull off the cabinet face frame.

Thankfully, no joints were pulled apart, no wood was broken - so the repair was simple and straight forward. We pulled the framework forward tightly against the inside of the cabinet face frame, then we used about 20 ea 2" #8 screws to pull it all back together. It worked out very well. There is NO-WAY this will ever need to be repaired again :)

Drawer framework pulled away from cabinet face - 1.jpg Drawer framework pulled away from cabinet face - 2.jpg Repairing Cabinet.jpg Cabinet Repair Complete - Other items observed and noted.jpg
 

jbeletti

Well-known member
My Mods: Added Vinyl Tiles to Bed Platform

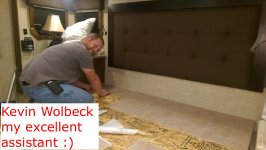
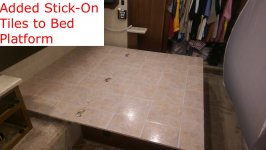
I did this in my first Landmark in 2005. Today, Kevin W and I added stick-on Vinyl Tiles to the bed platform in order to make it easier to pull the mattress down to change the sheets.

Bought the 12"x12" tiles at Lowes for 38 cents each. I think I bought 43 tiles and used 42 of them. Took us about 1 hour to put them on as we had to cut around hinges, trim some edges and drill some holes where there are screws in the platform.

Stick-on Vinyl Tiles for Bed Platform - In Progress - Kevin W.jpg Stick-on Vinyl Tiles for Bed Platform - Completed.jpg
 

fredwrichardson

Past New Mexico Chapter Leader
Re: My Mods: Experimental use of Refer Latch

Fred - got it via Amazon.com (link) - $20 delivered.

I like the fact that it matches the look of the refrigerator. My only issue is I have the Samsung three door and not sure it would work with the lower freezer door.
 

jbeletti

Well-known member
Re: My Mods: Experimental use of Refer Latch

I like the fact that it matches the look of the refrigerator. My only issue is I have the Samsung three door and not sure it would work with the lower freezer door.

I'm doubting the bottom freezer would need to be tied back for travel but I could be wrong. I don't recall seeing anything on bottom freezer of the Lifestyle RV.
 

Bones

Well-known member
Re: My Mods: Added Vinyl Tiles to Bed Platform

I did this in my first Landmark in 2005. Today, Kevin W and I added stick-on Vinyl Tiles to the bed platform in order to make it easier to pull the mattress down to change the sheets.

Bought the 12"x12" tiles at Lowes for 38 cents each. I think I bought 43 tiles and used 42 of them. Took us about 1 hour to put them on as we had to cut around hinges, trim some edges and drill some holes where there are screws in the platform.

View attachment 36434 View attachment 36435

This is a really good idea. I have just been lifting the mattress to put the sheets on.
 

jbeletti

Well-known member
Re: My Mods: Added Vinyl Tiles to Bed Platform

This is a really good idea. I have just been lifting the mattress to put the sheets on.

I too have been man-handling it but this will be easier. The bedroom slide depth is deep in LM, so it's not easy to get back there :)
 

'Lil Guy'

Well-known member
Re: My Mods: Experimental use of Refer Latch

Jim, I thought the Landmark came with its own live in maid. Are you telling me that if we upgrade to the LM we have to change our own bed clothes?
 

jbeletti

Well-known member
Re: My Repairs: Fixed Pantry Roll-out Drawer Stack

No doubt this info was "moved up the chain" ?

Absolutely. There's rarely a day goes by that I'm not gleaning something from the forum, Facebook or other retail interactions and feeding that back up the chain. This one went to the Plant Manager, Director of Production and the brand GM.
 

jbeletti

Well-known member
Re: My Mods: Experimental use of Refer Latch

Jim, I thought the Landmark came with its own live in maid. Are you telling me that if we upgrade to the LM we have to change our own bed clothes?

Sorry to burst your bubble Frank. Maybe train that cute little "Lil' Guy fund-raising" monkey of yours to change the sheets? :)
 

jbeletti

Well-known member
My Mods: Added Switched AC Recept in Bed Nightstand

The LM 365 Ashland has a nice nightstand on my side of the bed. I have a lamp on the nightstand as well as a clock and a CPAP machine. That's 3 AC powered items for a single duplex AC recept. I've been using a 3-way adapter but it's ugly and I'm tired of all the cords and the inline switch on the lamp cord.

I solved this today as follows:

  1. I drilled a 1.5" hole in the back corner of the top of the nightstand and installed a black desk grommet
    .
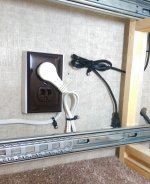
  2. There's a junction box in the side wall of the slide room inside the cabinet with a blank plate on it. This is where the stranded conductor wire from the slide connects to the solid conductor Romex-type wire that feeds the AC recept in the wall above the top of the nightstand. I added a shallow box extender and an AC recept there
    .
  3. I cut in a single gang box in the side of the cabinet next to and above the mattress
    .
  4. In the switch box, I added a Decora paddle switch and wired it to the new recept so the recept is now switched
    .
  5. I threaded the lamp cord through the grommet and connected it to a 3 foot extension cord with a flat plug and that extension cord to the new switched recept.
I now have a switched AC recept inside that cabinet that feeds my lamp. Now it will be real easy to turn the lamp on/off without having to reach across the nightstand and find that inline switch. I also got rid of all the wiring mess on the top. I even shoved the extra wire for the clock down the grommet hole, coiled it up and tie-wrapped it inside the cabinet. Finally, I used that putty-like stuff made for securing items to a horizontal surface and "stuck down" the lamp and the clock. No more removing the bulb, then the shade and securing it all and the clock for travel.

Thanks to Kevin Wolbeck for assisting me with this project.

Yet to do is swap out the white wall plate for a brown one. I could not find a 33 cent Decora brown wall plate - only the $4 fancy ones. Not! I used an on-hand white one for now.

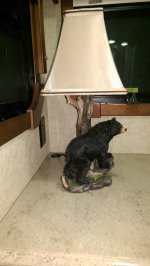
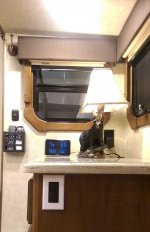
Switched Outlet for Lamp on Nightstand - Grommet Hole, Partially Drilled.jpg Switched Outlet for Lamp on Nightstand - Grommet Hole, Drilling Completed.jpg Switched Outlet for Lamp on Nightstand - Switch Box Installed.jpg Switched Outlet for Lamp on Nightstand - Outlet Installed.jpg Switched Outlet for Lamp on Nightstand - Lamp Installed.jpg Switched Outlet for Lamp on Nightstand - Lamp and Clock Installed 1.jpg
 

jbeletti

Well-known member
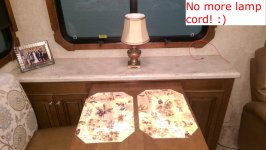
My Mods: Cored hole in Buffet Top for Lamp Cord

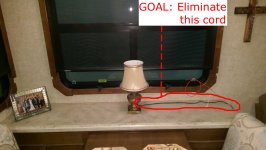
I prefer the clean look of minimal or managed cordage whenever possible. With this mod, my goal was to eliminate from sight, the power cord for a small lamp we keep on our buffet top behind the dinette.

Here's how I accomplished this project:

  1. I put the dinette table into it's fully extended position to provide clearance/safety for coring a hole
    .
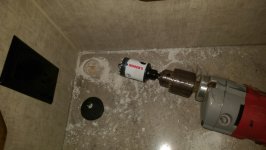
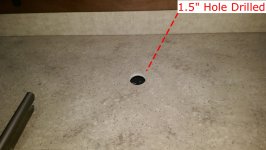
  2. I used a 1.5" hole saw to core through the LG Hausys solid surface
    .
  3. I popped in a black 1.5" desk grommet and threaded the lamp cord through it
    .
  4. I secured the lamp at 4 corners with that putty-like material used for securing items to horizontal surfaces
    .
  5. Inside the left cabinet in the buffet, I carefully routed the lamp cord, plugged it into an available recept in the cabinet and secured the cord with screw type zip ties. I tested cord clearance by opening and closing the table to ensure there was no contact made to the cord
That was it - a 15 minute project that gives us a nice looking, useful buffet top lamp with no visible cord.

Thanks to Kevin Wolbeck, my assistant on this project.

IMAG3362.jpg IMAG3363.jpg IMAG3365.jpg
 

jbeletti

Well-known member
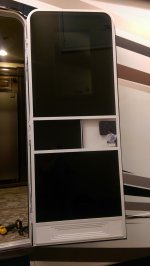
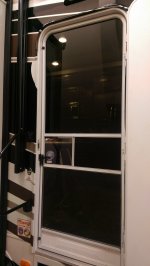
My Mods: Added Tinted Acrylic (aka Plexiglass) to Screen Door

Today, Kevin Wolbeck and I added Tinted Acrylic Glass (aka Plexiglass) to our screen doors. Mine took a couple hours. Kevin's took well less than half that, as we were experts by that time :)

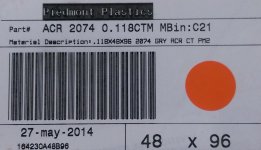
While in Knoxville, TN getting Cheap Heat installed at RVs for Less, Kevin found a glass shop that had in stock and could CNC cut Acrylic for us. He bought a 4'x8' sheet and gave Piedmont Plastics our measurements, then picked the material up the next business day.

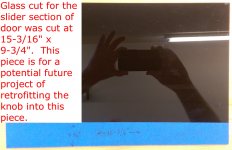
We had the top door sections cut to replace the screen and place the Acrylic in the tracks in the door frame (top, left and right sides). We had the bottom door sections cut to also fit into the tracks in the door frame (top and bottom) but we both left our lower screens in, just in case we want to pull the Acrylic off for airflow.

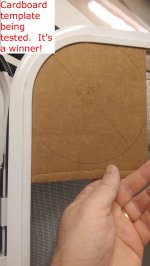
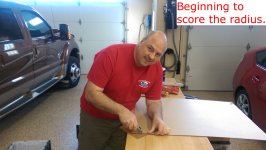
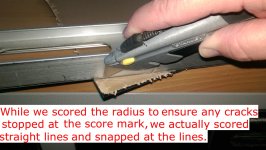
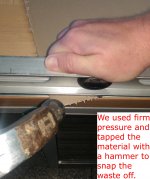
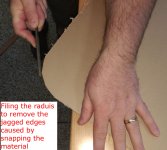
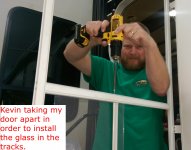
As the pieces (3 per door) were all cut to size, we only had to cut the two radiuses for the top corners of the top section, pull the door frame apart and install the Acrylic. Below are some images we took during this project.
Acrylic Glass Door Project - 01.jpg Acrylic Glass Door Project - 02.jpg Acrylic Glass Door Project - 03.jpg Acrylic Glass Door Project - 04.jpg Acrylic Glass Door Project - 05.jpg Acrylic Glass Door Project - 06.jpg Acrylic Glass Door Project - 07.jpg Acrylic Glass Door Project - 08.jpg Acrylic Glass Door Project - 09.jpg Acrylic Glass Door Project - 10.jpg

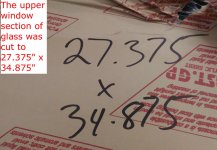
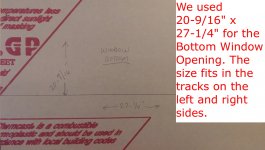
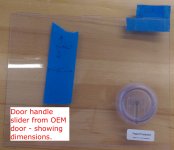
Here's some pictures with measurements that we used:
Acrylic Glass Door Project - 11.jpg Acrylic Glass Door Project - 12.jpg Acrylic Glass Door Project - 13.jpg Acrylic Glass Door Project - 14.jpg

Edit - 3-May-2015:

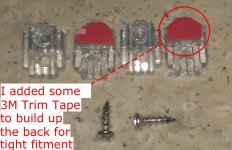
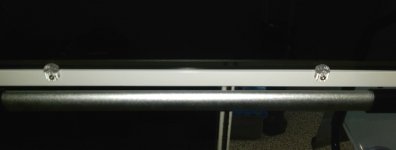
The way Kevin and I installed our glass, the bottom edge of the large upper glass and both the top and bottom of the smaller lower glass - sort of rattled a bit. We bought no less than 3 different sets of clips to use to hold the glass tight in the frame.

Kevin Frankensteined a plastic clip by drilling a hole in the end opposite the OEM hole. It worked! Still though, there was the slightest of gaps behind the clip in front of the glass. 3M Trim Tape to the rescue! I stuck my 6 pieces to some trim tape, the used a razor knife to trim them out. I left the peel-off-strip on the side of the trim tape that would touch the glass. Fitment was perfect. The thickness of the trim tape was just right to take up that small gap.

Team!
IMAG3441.jpg IMAG3442.jpg IMAG3445.jpg IMAG3444.jpg
 

Attachments

  • Piedmont Plastics statement.pdf
    173.4 KB · Views: 5
Last edited:
Top